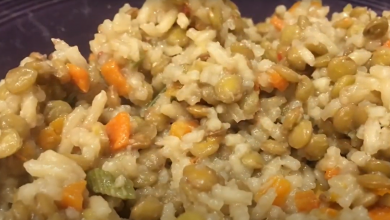
As seasoned preppers know, the key to surviving any unforeseen calamity, be it a natural disaster or societal collapse, is preparation. And what’s more fundamental to preparation than ensuring you have a stable food supply? Enter canning: an age-old technique that can make a crucial difference in times of need.
Canning allows you to preserve food for extended periods, often years, without the need for refrigeration. For both beginner and intermediate preppers, understanding the basics of canning could be a game-changer. Let’s delve into the world of canning, exploring its benefits, methods, and some essential product recommendations.
Why Canning?
1. Long Shelf Life:
When prepping for potential future challenges, the longevity of your food supply is paramount. Having food that lasts for a few weeks is good, but having food that remains safe and nutritious for several years is outstanding. Here’s why the extended shelf life of canned goods is crucial and some factors to consider:
Why is a Long Shelf Life So Essential?
- Extended Crisis Periods: While we often think of disasters as short-lived events, some situations, such as prolonged economic downturns or systemic infrastructure failures, can last for months or even years. During these periods, a food source that remains safe for a long time can be a lifeline.
- Unexpected Scenarios: Even the most adept preppers can’t predict every potential challenge. Whether it’s a job loss in the family or unexpected medical expenses, non-food emergencies can strain a budget. In such cases, having a stockpile of canned goods can act as an insurance, ensuring that your family remains well-fed.
- Reduced Waste: Food spoilage is not just a waste of resources but also a lost opportunity. With canned foods’ extended shelf life, you can virtually eliminate food waste from your inventory, ensuring that every ounce of effort and money invested in your stockpile provides value.
Factors Contributing to the Long Shelf Life of Canned Goods:
- Vacuum Sealing: During the canning process, the air in the jar is evacuated, creating a vacuum seal. This lack of oxygen significantly slows down the growth of bacteria and spoilage organisms.
- High Temperature Processing: The intense heat during both water bath and pressure canning kills off most microorganisms that could cause spoilage or illness. This sterilization is a primary reason why canned goods can last so long.
- Acidity and Salinity: Many canned items, especially pickled ones, have an elevated acidity or salt content. Both these factors are unfriendly environments for many bacteria, further enhancing preservation.
Keep in Mind:
- Quality vs. Safety: While many canned foods can last for years, it’s essential to note that their nutritional quality might degrade over time. Vitamins like C and some B vitamins are sensitive to heat and time. So, even if the food remains safe to eat, it might not be as nutritious as when freshly canned.
- Storage Conditions Matter: The longevity of canned goods is also influenced by where and how they are stored. A cool, dark, and dry environment can significantly extend the life of your canned goods compared to a damp, warm, and light-exposed location.
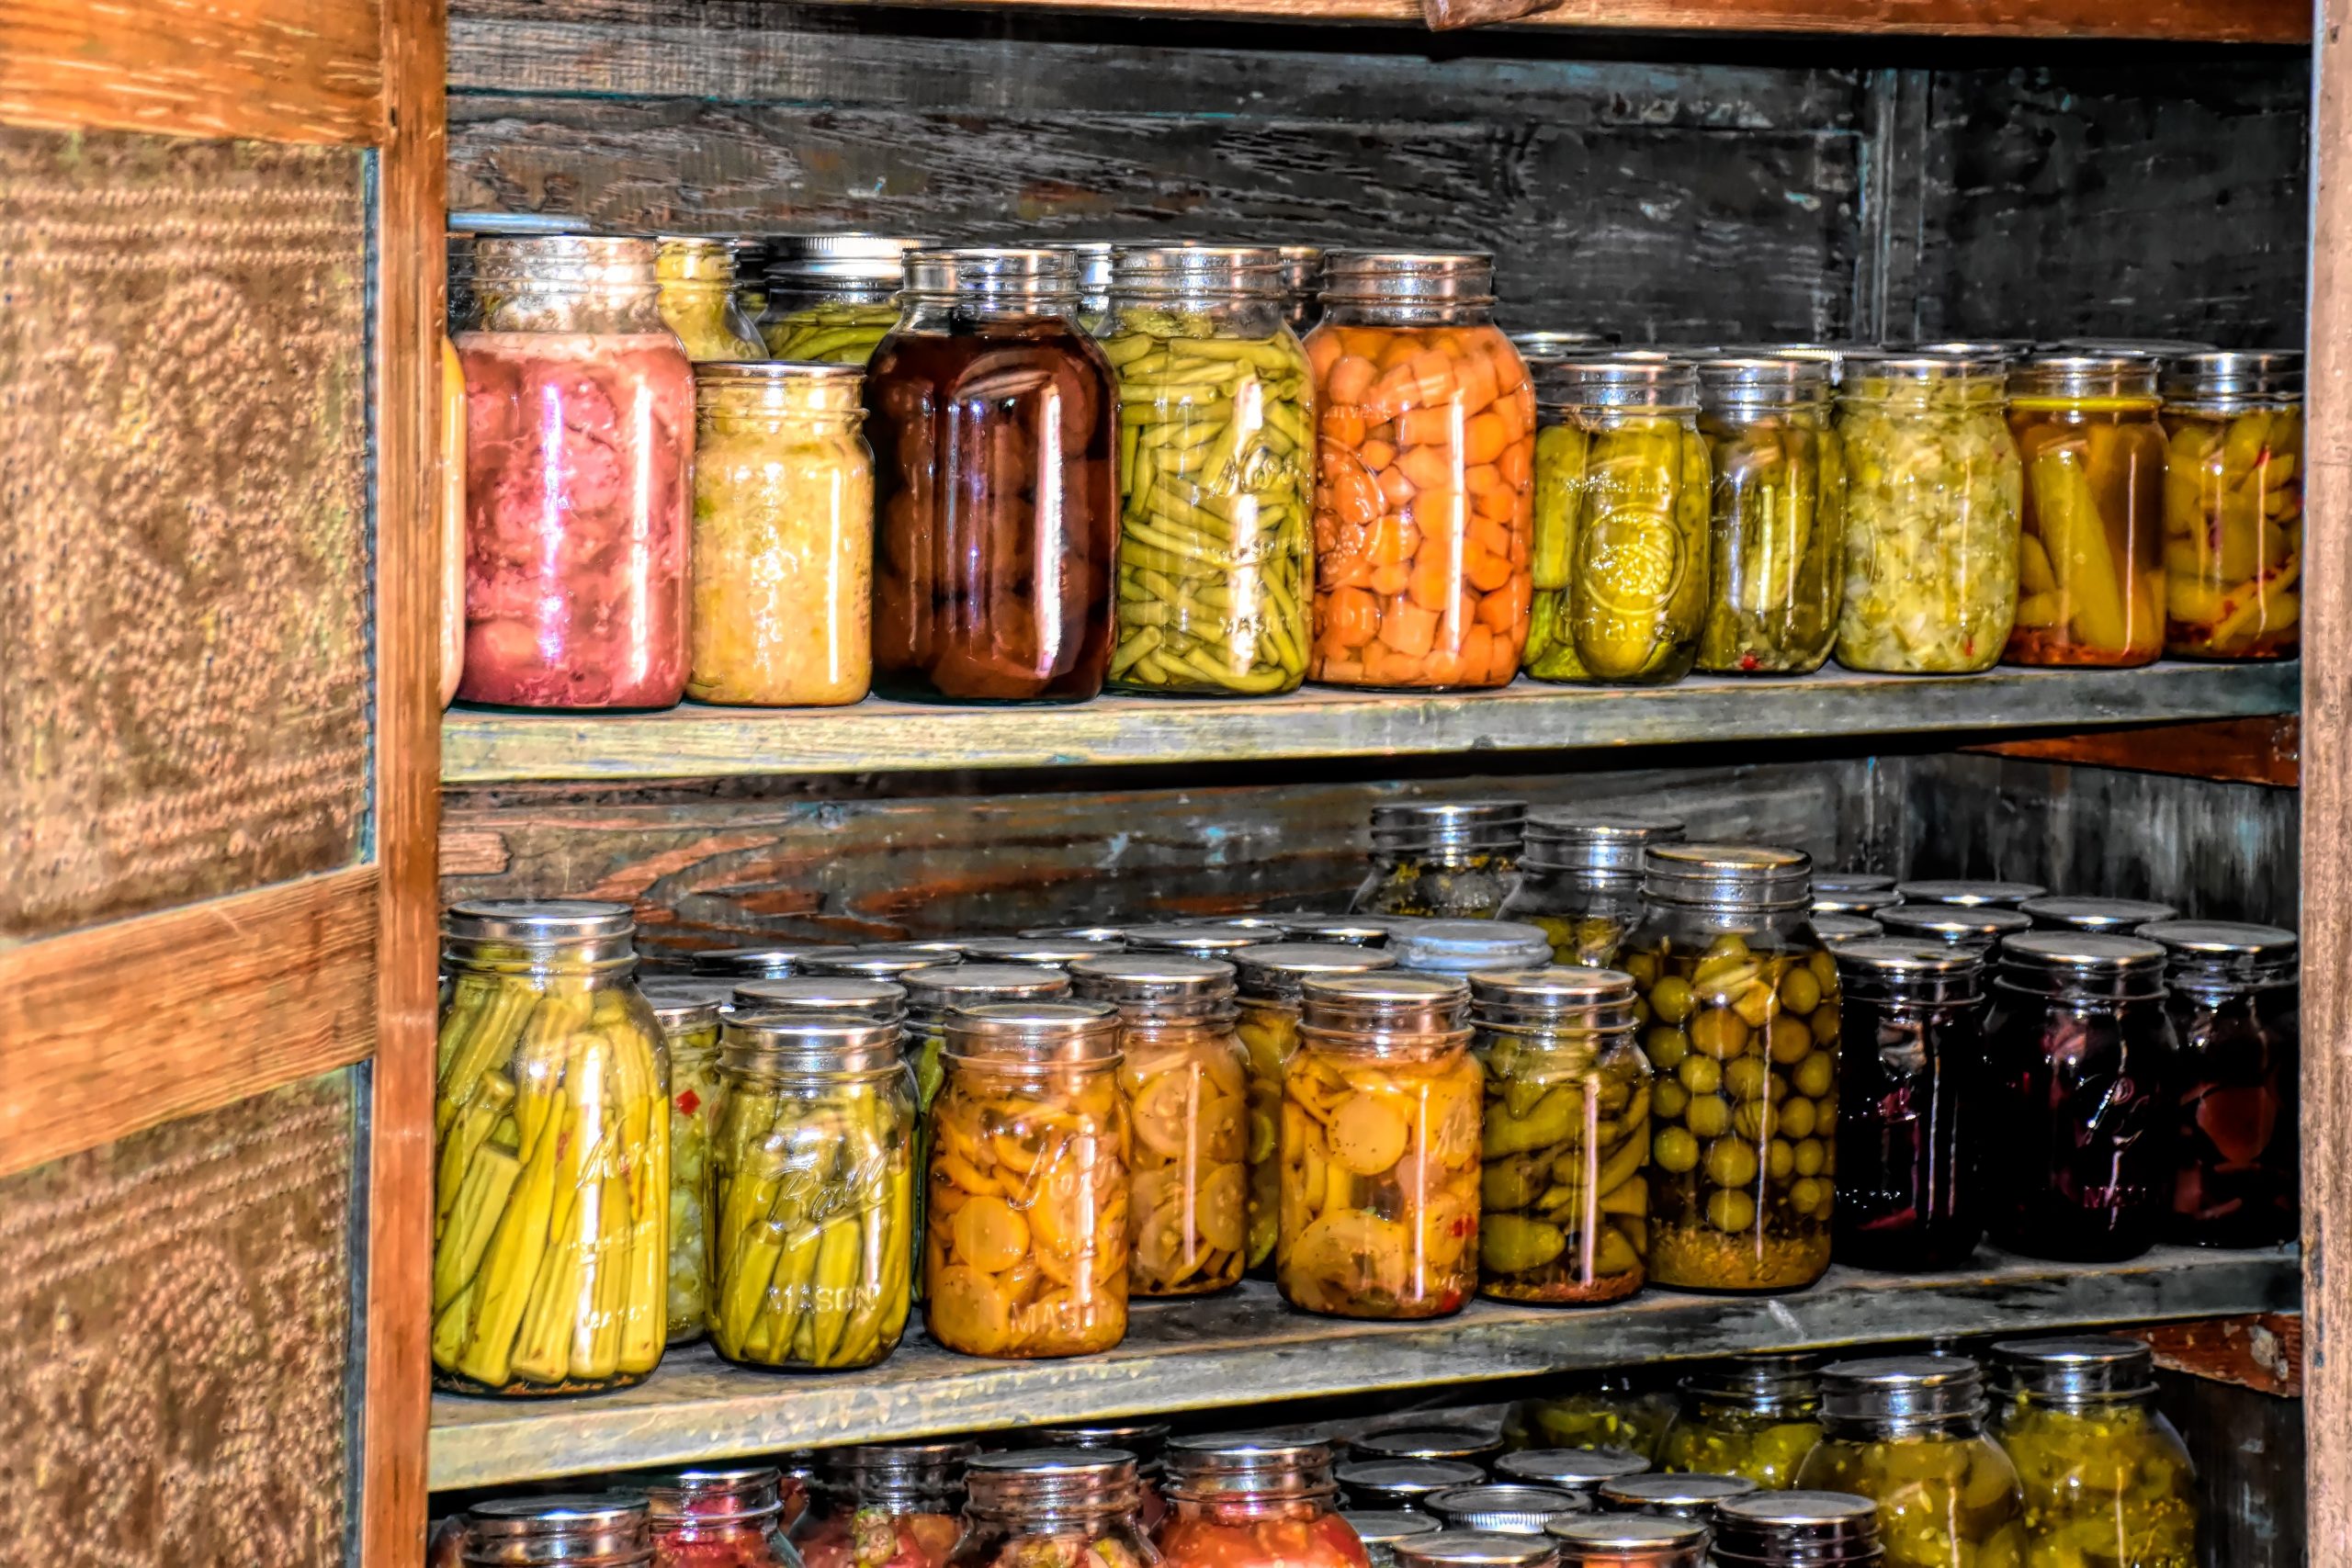
Picture a long-term grid failure where electricity becomes a luxury. Freezers and refrigerators become ornamental, but your canned beans, vegetables, fruits, and meats remain as they were – safe, delicious, and ready to eat. This preserved bounty doesn’t just offer sustenance but also a sense of normalcy in turbulent times.
The long shelf life of canned goods isn’t just a feature; it’s a significant advantage, making them a cornerstone of any well-thought-out prepper’s stockpile. Whether facing personal challenges or widespread crises, the value of a reliable, long-lasting food source cannot be overstated.
2. Nutritional Preservation:
When we talk about food storage, especially for extended periods, the first question that usually arises is about the nutritional content of the preserved food. Will those green beans you canned last summer still provide your family with vital nutrients two years down the line? The short answer is, “Yes, largely.” Let’s delve deeper into the subject of nutritional preservation when canning.
How Canning Preserves Nutrients:
- Immediate Preservation: Canning is akin to capturing the essence of food at its peak. When you can fruits or vegetables, you’re often preserving them at their ripest, which is typically when they’re most nutrient-rich. By canning them, you lock in many of the vitamins and minerals present at that time.
- Protection from Oxidation: Once canned, the food is sealed away from air. This prevents oxidation, a process that can degrade certain nutrients over time.
- Slows Down Degradation: While all foods naturally degrade over time, canning significantly slows this process. For example, the vitamin C in canned fruits and vegetables remains relatively stable, thanks to the absence of oxygen inside sealed cans.
Factors to Consider:
- Initial Heat: It’s true that the canning process, which involves heat, can lead to the loss of certain heat-sensitive nutrients, such as some B vitamins and vitamin C. However, this initial loss is typically the most significant decline the food will see. Once canned, the nutrient levels remain relatively stable over time, especially when compared to fresh produce that continues to degrade.
- Storage Conditions: While canning does an excellent job preserving nutrients, how you store the canned goods afterward can influence their nutritional value. Keeping canned foods in a cool, dark place can help retain more of their vitamins and minerals.
- Leaching: Some nutrients might leach into the canning liquid. But fear not! This is especially common with soups or broths. When consuming, if you use the liquid (like in soups or stews), you’re still getting the nutrients.
Comparing Fresh vs. Canned:
Interestingly, in some scenarios, canned produce might offer more benefits than their fresh counterparts, especially when considering the ‘farm to table’ time. For example, canned tomatoes might retain more lycopene (a beneficial antioxidant) than fresh tomatoes sitting on a store shelf for extended periods.
In essence, while there is some nutrient loss during the canning process, the subsequent preservation of the food ensures that the majority of its nutritional content remains intact for extended periods. In a prepping scenario, where access to fresh produce might be limited or nonexistent, the nutritional value of canned foods can prove to be a lifeline.
3. Economic Advantage:
Canning, beyond its primary purpose of preservation, has tremendous economic benefits that can provide a cushion in uncertain times. Let’s delve deeper into this advantage:
A. Bulk Purchases and Seasonal Savings
Buying in Bulk: Purchasing items in larger quantities often leads to discounts. For instance, if you spot a sale on tomatoes, buying a significant amount at a reduced rate and then canning them can lead to substantial savings compared to purchasing smaller quantities at regular prices over time.
Seasonal Savings: Every food has its season where it’s abundant and relatively cheap. Canning allows you to capture the bounty of one season and enjoy it year-round. Instead of buying strawberries in winter at a premium, you can enjoy your canned strawberries that you preserved at their peak and at a fraction of the off-season cost.
B. Protection Against Inflation
Price Stability: The cost of goods, including food, tends to rise over time due to inflation. By canning food when prices are lower, you essentially “lock in” that price. If you’ve canned green beans when they were cheap, you won’t feel the pinch when prices spike during a shortage or economic downturn.
Hedging Against Uncertainty: Economic downturns, crop failures, or global events can lead to sudden spikes in food prices. Having a cache of canned goods ensures that you aren’t at the mercy of these price hikes, providing both economic and emotional relief.
C. Reducing Wastage and Maximizing Utility
No Spoilage: Fresh produce has a limited shelf life. By canning, you prevent this food from going to waste, translating to economic savings. Consider the cost of throwing away spoiled vegetables versus the value of a jar of preserved ones.
Optimal Use of Resources: Let’s say you have a garden. In some years, you might have an overabundance of a particular produce. Instead of letting it rot or giving it away, canning allows you to convert this surplus into a valuable resource for the future.
Imagine a situation where a sudden frost severely affects the apple harvest in your region. Apple prices skyrocket. But the previous year, you had canned apple sauce, apple pie filling, and even apple slices when there was a surplus, and apples were cheap. Not only do you have a ready supply at home, saving you from paying inflated prices, but you’ve also captured the freshness and flavor of the apples at their peak.
The economic advantage of canning extends far beyond mere penny-pinching. It’s a strategic move that harnesses the fluctuations of the market, the rhythms of nature, and the unpredictability of life. Embracing canning not only secures your food supply but also ensures that your hard-earned money provides the maximum value over time.
Imagine a prolonged power outage due to a massive storm, making your refrigerator useless. With a stash of canned goods, you’ll still have access to safe, nutritious meals.
The Two Main Canning Methods
Water Bath Canning:
Water bath canning, often simply referred to as “boiling water canning,” is a method best suited for high-acid foods. This method relies on the simplicity of boiling water to eliminate common molds, yeasts, and enzymes found in many fruits and pickled vegetables. The acid in these foods ensures safety by creating an environment in which harmful bacteria, like botulism, can’t survive.
Why Use Water Bath Canning?
- Safety: It’s a reliable method for high-acid foods.
- Simplicity: No special equipment required beyond a large pot.
- Versatility: From jams to pickles, a variety of foods can be preserved this way.
Steps for Water Bath Canning:
- Gather Your Supplies:
- Large canning pot or stockpot with lid
- Canning jars, lids, and bands
- Jar lifter
- Funnel
- Bubble freer or a non-metallic spatula
- Clean towels
Product Recommendation: A Granite Ware Enamel-on-Steel Canning Kit is an all-in-one package for beginners.
- Prepare Your Jars:
- Wash jars, lids, and bands in hot, soapy water. Rinse well.
- Sterilize jars by boiling them in a large pot for 10 minutes. Keep them in hot water until you’re ready to fill them.
- Cook Your Recipe: Prepare your chosen high-acid food, following a trusted canning recipe.
- Fill Your Jars:
- Remove a jar from the hot water using the jar lifter and drain.
- Place the funnel on the jar and pour in your food, leaving appropriate headspace (usually 1/4 to 1/2 inch).
- Run a bubble freer or spatula around the inside edge of the jar to remove air bubbles.
- Wipe the rim with a clean cloth to remove any residues.
- Place a sterilized lid on the jar, ensuring it’s centered. Screw on the band until fingertip-tight.
- Process Your Jars:
- Place jars in your canning pot, ensuring they’re covered by at least 1-2 inches of water.
- Cover the pot and bring water to a rolling boil.
- Process (boil) jars for the time specified in your recipe.
- Once processed, turn off the heat and let jars sit for 5 minutes in the pot.
- Cool and Store:
- Using the jar lifter, carefully remove jars from the pot and place them on a towel, ensuring they’re not touching.
- Let jars cool for 12-24 hours.
- Check the seal by pressing the center of the lid. If it doesn’t pop back, it’s sealed.
- Store jars in a cool, dark, and dry place.
Important Tips:
- Altitude Adjustments: Boiling temperatures decrease as altitude increases. If you’re canning at an altitude higher than 1,000 feet above sea level, adjust processing time or pressure as necessary.
- Acidity Matters: Only use water bath canning for high-acid foods. Low-acid foods require pressure canning.
- Use Fresh Produce: For the best flavor and safety, always use fresh, ripe, and unspoiled produce.
Water bath canning is a fantastic entry point for newcomers to the world of preservation. It’s straightforward and, with a little practice, can allow you to capture the bounty of summer’s harvest to enjoy throughout the year. Remember, every time you hear a “pop” from a cooling jar, it’s the sound of self-sufficiency and a job well done!
Pressure Canning
Pressure canning is a fundamental skill every prepper should master, especially if you’re keen on preserving a wide variety of foods. Given its crucial role in ensuring the safety of low-acid foods, understanding the nuances is imperative. Let’s explore pressure canning in detail.
Why Pressure Canning?
Low-Acid Foods: Foods like meats, poultry, vegetables (except for most tomatoes), and many soups are low in acid. These types of foods can’t be safely canned using a water bath method because dangerous bacteria, like Clostridium botulinum which causes botulism, thrive in low-acid, low-oxygen environments. These bacteria aren’t killed at boiling temperatures. Pressure canning, however, heats contents to 240°F (115°C) – a temperature that eliminates these threats.
Step-by-Step Guide to Pressure Canning:
1. Preparation:
- Clean and sterilize your canning jars and lids. You can do this by boiling them in water for 10 minutes.
- Prepare the food you wish to can according to your recipe.
2. Filling the Jars:
- Use a funnel to guide food into jars. This reduces spills and keeps the jar rims clean.
- Leave appropriate headspace (usually about 1 inch) at the top. This space allows food to expand as it heats and creates a vacuum seal as it cools.
- Use a bubble freer or a non-metallic spatula to slide down the sides of the filled jar, releasing any trapped air bubbles.
- Wipe the rims with a clean cloth to ensure a proper seal.
3. Sealing and Loading:
- Place the sterilized lid onto the jar, ensuring it’s centered.
- Screw on the band until it’s finger-tight. Avoid over-tightening.
- Using a jar lifter, place jars into the pressure canner, which should have 2-3 inches of water at its base.
4. Processing:
- Seal the pressure canner and turn up the heat.
- Once the canner starts venting steam, allow it to vent for about 10 minutes. This ensures the air is removed from the canner.
- Place the weight on the vent and wait for the canner to come up to pressure.
- Once the desired pressure is reached (based on your recipe and altitude), start your timer.
- Adjust the heat as needed to maintain steady pressure. Consult your canner’s manual and the recipe for the correct pressure level.
- Once the processing time is up, turn off the heat and let the canner depressurize naturally. This might take 30-45 minutes.
5. Cooling and Storage:
- Once depressurized, open the canner lid away from you to avoid steam burns.
- Use a jar lifter to remove jars and place them on a towel or cooling rack. Ensure there’s space between the jars for air circulation.
- Allow jars to cool for 12-24 hours. As they cool, you’ll likely hear a “pop” – a sign of a successful seal.
- Test the seal by pressing the center of the lid. It shouldn’t pop back. If it does, refrigerate and consume that jar first.
- Store sealed jars in a cool, dark place.
Important Notes:
- Altitude Adjustments: The boiling point of water drops as altitude increases, so you need higher pressures to achieve the required temperature. Consult a canning guide for specific adjustments based on your altitude.
- Safety First: Never rush the depressurizing step. Opening the canner prematurely can cause jars to break or prevent proper sealing.
Product Recommendation: For those looking for an efficient pressure canner with a solid track record, All American 921 Canner Pressure Cooker offers a larger capacity and durable build, ensuring reliability and performance.
Pressure canning, while initially daunting, is a rewarding skill that ensures the safety and longevity of many foods. With the right equipment and a keen attention to detail, you can stockpile a range of provisions, from sweet corn to hearty beef stew. In a prepper’s arsenal, this knowledge is a potent tool, ensuring sustenance and security in uncertain times.
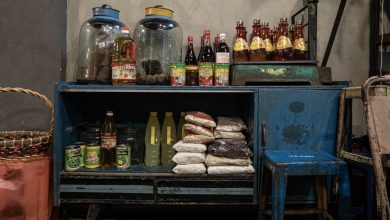
Essential Canning Supplies:
- Jars and Lids: Mason jars are the gold standard for canning. They’re durable and designed specifically for preserving food. Always inspect for nicks or cracks before using.
- Product Recommendation: Ball Mason Jars have been trusted by canners for over a century.
- Jar Lifters: This tool ensures you can safely move hot jars out of boiling water.
- Bubble Freer: This helps in removing air bubbles before sealing the jar.
- Funnel: Helps in pouring and packing without the mess.
Pro Tips:
- Stay Clean: Sterility is crucial in canning. Ensure your jars, lids, and any equipment you use are clean and sterilized.
- Follow the Recipe: Especially when starting, adhere to trusted canning recipes. The correct proportion of ingredients ensures safe preservation.
- Storage: Store your canned goods in a cool, dark place to extend their shelf life and preserve quality.
While the modern world has somewhat distanced us from such traditional practices, canning is a bridge that connects us to our ancestors while preparing us for uncertainties the future might hold. It’s an essential skill, and as a prepper, it’s an arrow you’ll definitely want in your quiver. So, next time you see a bumper crop of tomatoes or a sale on berries, consider canning them. Your future self might thank you.
Additional Reading:
Canning is both an art and a science, and there’s a wealth of knowledge out there to help beginners and intermediate canners. Here’s a curated list of books to help you on your canning journey, including some written specifically for preppers:
- “Ball Complete Book of Home Preserving“ edited by Judi Kingry and Lauren Devine
- This is a staple in the canning community. It provides over 400 recipes for canning and preserving foods, making it perfect for beginners and intermediate canners alike.
- “The All New Ball Book Of Canning And Preserving: Over 350 of the Best Canned, Jammed, Pickled, and Preserved Recipes“
- This book is from the makers of Ball jars, and it’s comprehensive. It covers everything from the basics of canning to fermenting, curing, and smoking.
- “The Prepper’s Canning Guide: Affordably Stockpile a Lifesaving Supply of Nutritious, Delicious, Shelf-Stable Foods“ by Daisy Luther
- Tailored specifically for the prepper community, this book merges the art of canning with the mindset of being prepared. It’s filled with tips, tricks, and recipes that are perfect for long-term food storage.
- “Canning for a New Generation: Updated and Expanded Edition: Bold, Fresh Flavors for the Modern Pantry“ by Liana Krissoff
- It gives a modern twist to traditional canning recipes and methods. This is great for those looking to expand their palate and try something new.
- “Preserving Food without Freezing or Canning: Traditional Techniques Using Salt, Oil, Sugar, Alcohol, Vinegar, Drying, Cold Storage, and Lactic Fermentation“ by the Gardeners & Farmers of Terre Vivante
- If you’re looking to go beyond the traditional methods of canning, this book introduces other preservation methods that our ancestors used, many of which are still applicable today.
- “The Prepper’s Water Survival Guide: Harvest, Treat, and Store Your Most Vital Resource“ by Daisy Luther
- While not strictly about canning, water is an essential resource for preppers. This guide delves into the importance of water, ways to store it, and how to purify and filter it in emergency situations.
- “Food in Jars: Preserving in Small Batches Year-Round“ by Marisa McClellan
- If you’re working with smaller batches or limited storage space, this book is a gem. It provides recipes specifically tailored for smaller yields, making it great for those just getting started or living in urban spaces.
- “The Joy of Pickling: 250 Flavor-Packed Recipes for Vegetables and More from Garden or Market“ by Linda Ziedrich
- Pickling is a major aspect of canning. This book covers a wide range of pickling recipes, from the traditional to the exotic.
Each of these books offers a unique perspective and invaluable knowledge on canning and preserving. Whether you’re a newbie or an intermediate canner, or a prepper seeking to build a reliable food stash, there’s something in this list for everyone. Happy canning!
Photo by Ray Shrewsberry on Unsplash